
I always browse through the forums to see what questions are being asked and I try to answer when I can. Lately with this pandemic going on, there seems to be a lot more interest in the hobby. And a lot more starter questions around where to start with start-up equipment.
In the Moonshine forums the main theme is always the still. But many people have been asking “Where do I get started with equipment? What do I buy for fermenting?”
In my opinion it’s an easy answer. I went to my local brewing store and purchased an equipment starter kit for about $130. You can go to some garage sales and hope to find some equipment, but that takes time. And sometimes you have a lot of cleaning you have to do. And if its the off season, well… your just out of luck.
Fermenting Equipment
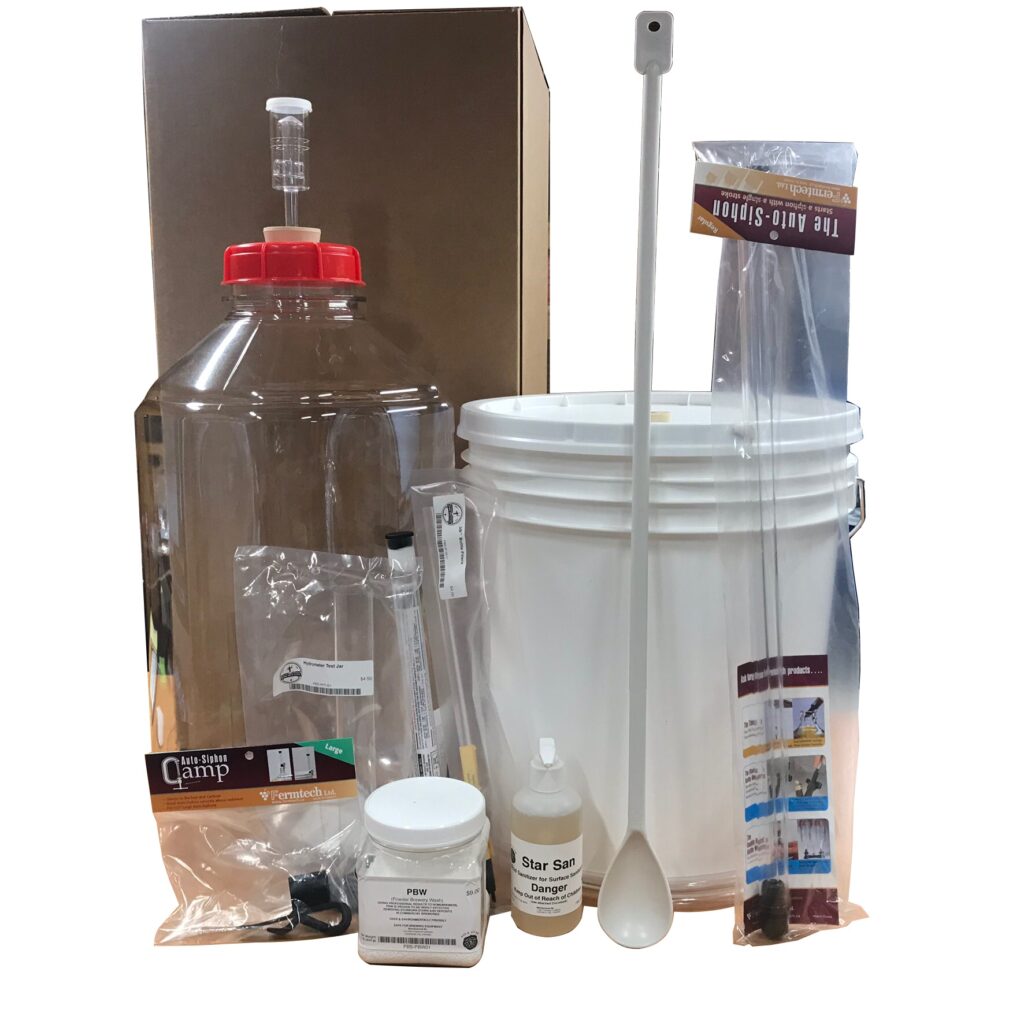
These 5 gallon equipment kits usually come with the following items:
- 6 gallon fermentation pail,
- Pail lid
- 6 gallon carboy,
- Racking cane,
- Bottle filler,
- Hose
- 24″ plastic Spoon
- And some bleach powder.
Getting Started
Dissolving the sugar
To dissolve the sugar, you can just use your largest kitchen pot to boil up some water and dissolve your sugar. This will get you going for a basic sugar wash. Just keep boiling up a pot of water and dissolve as much sugar you can from your recipe. When it’s completely dissolved, pour it in your pail, and on to the next pot. When you are done dissolving your sugar, fill up your pail to the marker with room temperature water and that will cool it down enough to pitch the yeast. As for water, I usually go to the local grocery store and refill a 5 gallon water jug for a couple of dollars with their filtered water.
Sealing the fermenter
An important step here is to stir the mash in the pail vigorously to get as much oxygen in the mash as you can. The yeast needs oxygen at this point. Once you have stirred the mash for a couple of minutes, you need to close the pail up.
This is where you have to look at your equipment and see what you have because they are not all the same. Look under your lid. Does it have a rubber o-ring around the edge? If it does, all you have to do is place the lid on the pail. DO NOT snap the lid down. I’ve learned that from example. Yeast releases CO2 and the pail lid will swell up like a balloon. If I didn’t burp the lid to release the CO2, the mash would have been all over my ceiling.
So, if your lid does not have an O-ring you have some choices. Look to see if there is a small hole in the lid with a rubber grommet. This would be for your air lock. If this is what you have then you want to snap your lid down. Don’t forget to put the airlock in and fill it up half way with water or a starsan mixture if you have it. If there is no lid, you might want to find a rubber grommet at your brew store and drill a hole. But your brew store should be selling you either of the two solutions.
Now the last resort. What do you do if you don’t have a lid (For the DIY King)? This idea came from a friend of mine when I was getting a bit of a crash course on some distilling. You can actually use a garbage bag as long as you turn it inside out. The reason being is there are chemicals on the inside of the bag that are used to deodorizer the garbage inside. Just tuck the bag around and underneath the pail.
Put the pale in an area of the house where it’s going to be around room temperature. Not to hot, and not to cold. So don’t put it in the cold storage room or beside a hot furnace.
Easy Start-up Fermenting Equipment
From this, you will have a basic sugar wash for beginners without breaking the bank. It can be as simple as this to get started.
Easy Start-up Equipment for fermenting!